![knowledge-base-header-bcn3d-logo.png]](https://support.bcn3d.com/hs-fs/hubfs/Knowledge%20base/Header/knowledge-base-header-bcn3d-logo.png?height=40&name=knowledge-base-header-bcn3d-logo.png)
 |
Attention! Electrical Hazard it's very important to turn off and disconnect the printer to avoid short circuits or any risk of electrocution. |
The First step is to unload the filament if necessary and remove the Bowden tube from the printing head.
| Tools | |
 |
Allen key 2.5 mm |
Next, remove the extruder board cover by unscrewing the 2 lower screws.
/extruder%20cover%202.jpg?width=344&height=459&name=extruder%20cover%202.jpg)
/extruder%20board%202.jpeg?width=344&height=459&name=extruder%20board%202.jpeg)
Then unscrew the side cover of the printing head for better access and detach the cooler fan.
/left%20cover%20without%20extruder%20cover%202.jpg?width=400&height=534&name=left%20cover%20without%20extruder%20cover%202.jpg)
/remove%20cover%202.png?width=393&height=454&name=remove%20cover%202.png)
Cut the cable ties holding the cables connected to the extruder board. Be very careful when cutting the cable ties to ensure that you do not pinch any cables.
/bridas%20extruder%20board.jpg?width=670&height=1190&name=bridas%20extruder%20board.jpg)
/cutting%20cable%20tie.jpg?width=670&height=377&name=cutting%20cable%20tie.jpg)
Unscrew and remove the hotend tip. Then, you can easily remove the heater block by pulling it off.
/unscrew%20hotend%20tip.jpg?width=670&height=377&name=unscrew%20hotend%20tip.jpg)
/pull%20heater%20block.jpg?width=670&height=377&name=pull%20heater%20block.jpg)
Disconnect the hotend cables from the extruder board connector. Hold the extruder board as it is a delicate component.
/hotend%20wire.jpg?width=670&height=377&name=hotend%20wire.jpg)
/secure.jpg?width=670&height=377&name=secure.jpg)
Re-insert the new cable into the extruder board connector and insert the heater block by aligning the elastic spring of the heater block with the housing.
/hotend%20hole.jpg?width=670&height=377&name=hotend%20hole.jpg)
/heater%20block%20installed.jpg?width=670&height=377&name=heater%20block%20installed.jpg)
It is advisable to reinstall cable ties to hold the wires in place.
Re-insert the hot end tip all the way in, check that there is no play and make sure the heatsink and plastic nut are tight.
/screw%20hotend%20tip.jpg?width=670&height=377&name=screw%20hotend%20tip.jpg)
/heatsink-1.jpg?width=670&height=1190&name=heatsink-1.jpg)
/plastic%20nut.jpg?width=670&height=377&name=plastic%20nut.jpg)
Reinstall the cooler fan, print head covers and Bowden cable.
 |
 |
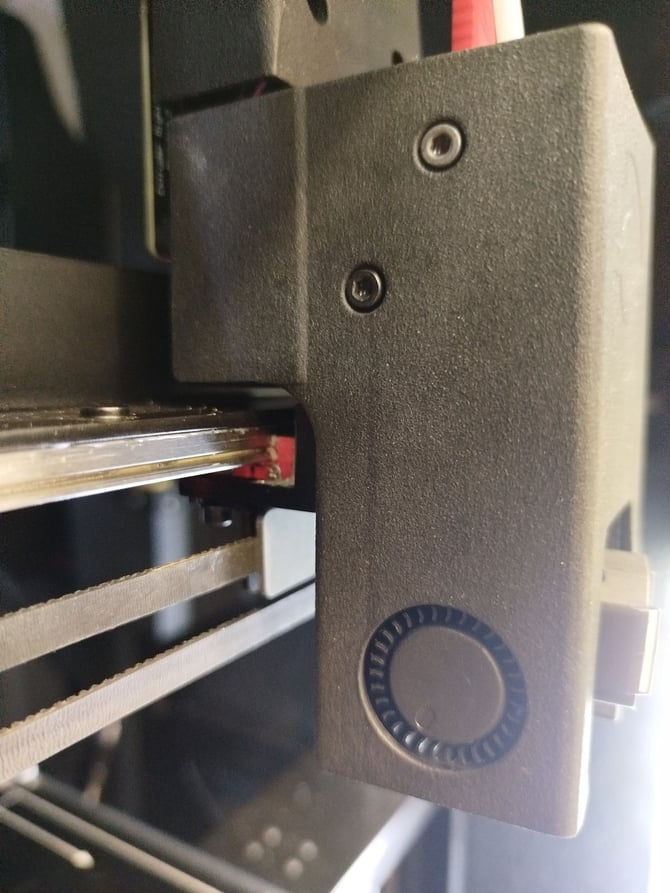 |
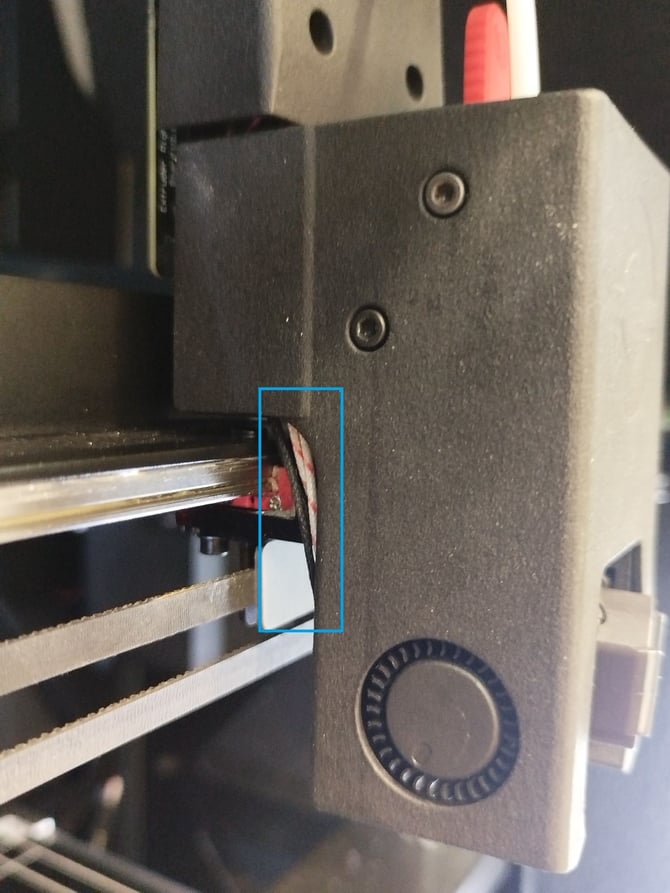
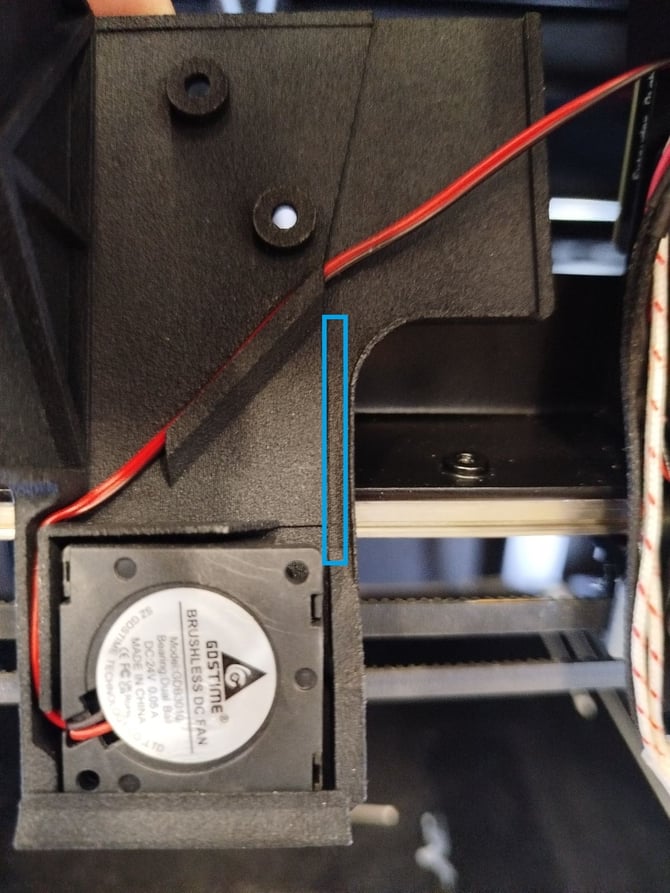
When installing the left cover make sure that the heater block cables follow the inner path of the cover to avoid any damage.
Then, turn on the printer, go to the Printer Set-up menu and preheat the printing head to confirm the replacement has been done correctly.
In case of doubt, contact our BCN3D support at omega-assistance@bcn3d.com