When the print job is completed, could be necessary to do some tasks to improve the surface finish of the printed model to be used as an end-use product or to meet dimensional requirements
Introduction to post-processing in 3D printing
Thanks to the versatility of the 3D print, is possible to get high-quality parts for end-use products. To reach this goal, the post-processing of a print can be necessary on some occasions, with the purpose of meeting the dimensional requirements or improving the appearance of the model.
The post-processing tasks could be different depending on the material that you're using, for example, sanding PLA with an electrical tool can deform the model due to high temperatures created by the friction. Also, the metal materials needs specific post-processing tasks.

In this article, you will find the most common processes with tips to realize them:
Content table
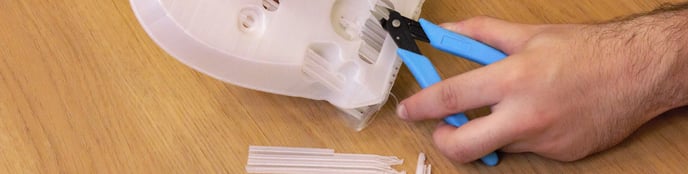
This process is quite common when the material is prone to leaving threads, when the supports are not soluble or easy to remove, or in the case of the elephant foot effect.
- You will only need cutting pliers for this process. Keep in mind that using a more precise tool can help you to leave the surface cleaner and save post-process time.
Also, using a heat gun you can remove thin strings that materials like the TPU or the PET-G leave on the surface of the model. Take into account that this process could deform the model, so be careful and don't apply heat over the same area of the model for a long time and let the printed part cool down.
Sanding and polishing

Most materials are compatible with this operation. However, the thermal resistance of the material must be considered when sanding or polishing, since it can deform the piece due to the increase in temperature generated by the friction.
This process is recommended to finish cleaning leftover burrs or threads that remain on the piece, as well as to smooth the superficial layers when printing with 0.8mm or 1mm hotends.
Sanding could be used to improve the adhesion of any coat, like paint, that you need to apply over the model. Keep in mind that sanding a printed part will scratch the surface.
Down below you will find several tips for sanding and polishing your piece:
- For pieces with low thermal resistance, it is recommended to use sandpaper in order to avoid excess friction and control the temperature.
- For finer or narrower details, the best option is to use precision abrasive files that will improve the control of the process.
- Power tools should only be used with materials that have high thermal resistance such as PAHT CF15 or PP GF30.
- For better results, we recommend using multiple tools that gradually have a higher number of grits, this will improve the result on each iteration.
- In the case of sanding pieces that have fiber material such as PAHT CF15 or PP GF30, it is essential to wear a mask and safety goggles because of the particles they release.
Gluing
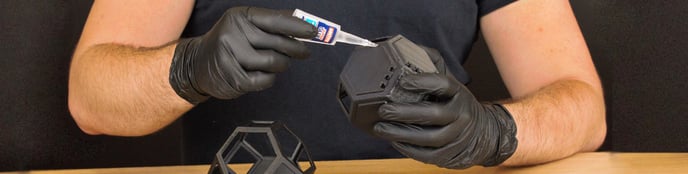
In the case of printing a model in multiple parts or needs to secure an accessory, would be necessary to glue these parts together. This process is very easy and you will only need contact glue.
The following aspects must be taken into account to make the joint as strong as possible:
- If you use liquid consistency glue, you have to make sure that the faces of the pieces to be joined are as smooth as possible in order to have proper adherence.
- If the glue is more consistent, you have to make sure that the end surface of the pieces is porous, this will allow the glue to adhere better. To do this, you can sand the contact surface with coarse-grit sandpaper.
- To increase the strength of the pieces that need to be glued, you can make some inserts between the pieces, this will make the process easier.
- It is not recommended to use melt adhesives with materials that can be deformed by high temperatures.
Priming and painting

This process can improve greatly the appearance of the print, giving it a smooth and uniform look. Not only can you paint the model but you can also add covering that will contribute additional characteristics, like resistance to corrosion.
- Note: Check that the coating or paint that you will use doesn't contain dissolvents that can react with your model. Materials like ABS or PLA have low chemical resistance.
Follow the next steps to prime and paint your models:
1. Prepare the surface of the printed part, sanding it to remove any imperfections and contribute to a uniform look.
2. Prime the object you want to print
This consists of adding a coating product to the surface that will improve the adhesion of the paint, remove any porosity left by the sanding and protect from corrosion.
- This task can be done multiple times, leaving it to dry between each layer in order to get a smooth surface for the paint.
3. Paint or apply the desired covering.
The final appearance will improve with each layer of paint applied.