If you hear strange squeaking noises coming from the Z-axis, even though you already lubricated it, it's time to realign the Z-axis. It doesn't happen so often, but it can happen over time. Follow the next steps to realign the Z-axis:
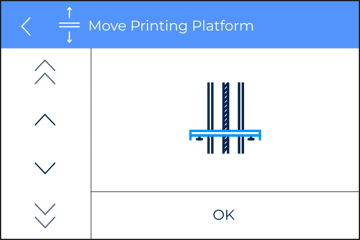
1. Go to Utilities/Maintenance/Move printing platform and move the printing platform to its middle position.
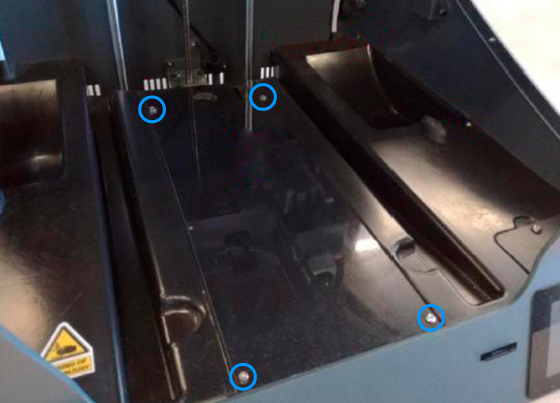
.jpg?width=688&name=IMG_20201014_155920%20(1).jpg)
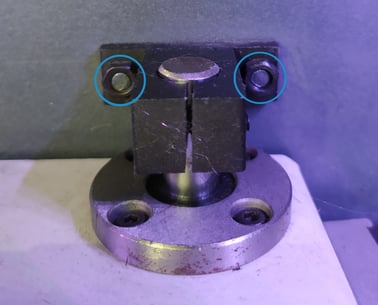
.jpg?width=688&name=IMG_20201014_155756%20(1).jpg)
5. From the Move printing platform menu (Utilities/Maintenance/Move printing platform), lower the platform to its bottom position. Once in the bottom, move it back up all the way to the top
6. Repeat the previous step a couple of times to align the Z-axis.
Conclusions
To reassemble again the axis, follow the previous steps from step 4 and in reverse order.
Forum community
Repair didn’t go as planned? Check out our forum community for troubleshooting help.
It's important to keep your printer in good shape to make the most out of it. In this chart you can find a list of the extruder maintenance procedures and how frequently these should be done. Maintenance Plan.
![]() Take your e-waste to a certified recycler. Check how we do it in BCN3D.
Take your e-waste to a certified recycler. Check how we do it in BCN3D.
|
You can help improve the BCN3D Knowledge Base. If you feel there are guides that we are missing or you found any error, please use this form to report it. Report form :) |