
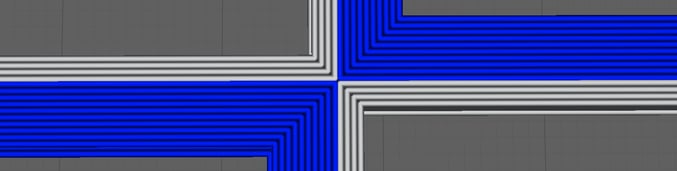

With this option the printing order of the walls is changed, making the outer contour printed first.
On:
Reduces the visibility of infill marks on the surface.
The dimensions of the printed part are closer to the design dimensions.
Off:
Makes it easy to print bridges and overhangs.
Increases the compressive strength of the printed model.
Recommendations:


.jpg?width=677&name=1619783530190%20Cropped%20(1).jpg)
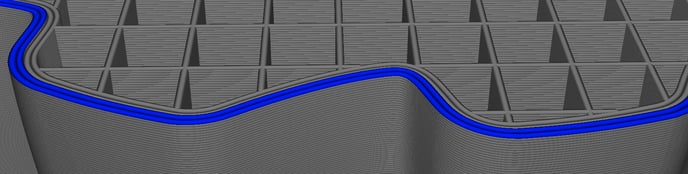
When the beginning and end of the layers meet at the same point along the Z-axis, a seam is formed in the printed pattern. With the seam alignment parameter, you can choose how the initial points of the layers are located in order to hide them, depending on the geometry of the piece.
Specify: Locates the seam in the specified direction in absolute coordinates.
Shorter: The start of each layer is at the end of the previous one, making the printing process very fast but with a more visible seam. - This option is for applications where aesthetics are not a priority and less printing time is required.
Random: The start of each layer is random and allows to eliminate stitching at the cost of increasing printing time. - This option is useful in models that do not have exterior walls with angles, such as cylinders.
Sharper corner: Place the seam in the inner or outer corner of the model whenever it is possible. - This is the best option with pieces that have exterior angles, such as cubes, because the seams are perfectly hidden.
Ironing

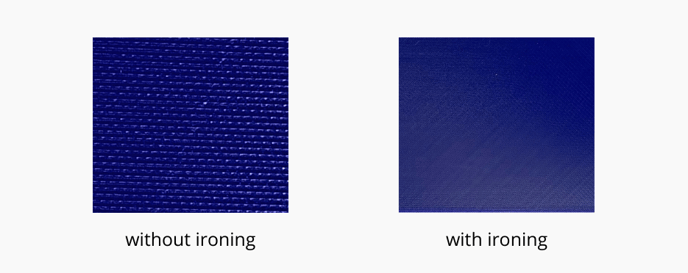
Smoothing is a process in which the hotend moves over the top layer after printing, to iron it to a smooth surface.
The method in which the smoothing is done can be adjusted to obtain the desired surface finish:
Highest Layer Only: This option will cause only the last printed layer to be smoothed, saving printing time.
Pattern: is the method the ironing is done.
Smoothing Line Spacing: Determines the space between each stroke of the hotend. More distance means less printing time but a worse surface finish.
Flow: is the amount of extruded material during the smoothing process and it serves to fill extra cracks or holes.
Smoothing insert: saves distance between the edge of the piece during the smoothing process. Eliminating this distance can cause jagged edges.
Speed, acceleration, and impulse.
Forum community
Need more tips? Check out our forum community for help.
It's important to keep your printer in good shape to make the most out of it. In this chart, you can find a list of the extruder maintenance procedures and how frequently these should be done.
Maintenance Plan (Epsilon Series)
Maintenance Plan (Sigma Series)
Maintenance Plan (BCN3D Sigmax)
Maintenance Plan (BCN3D Sigma)
![]() Take your e-waste to a certified recycler. Check how we do it in BCN3D.
Take your e-waste to a certified recycler. Check how we do it in BCN3D.
|
You can help improve the BCN3D Knowledge Base. If you feel there are guides that we are missing or you found any error, please use this form to report it. Report form :) |