Introduction to Translucent 3D Printing Materials
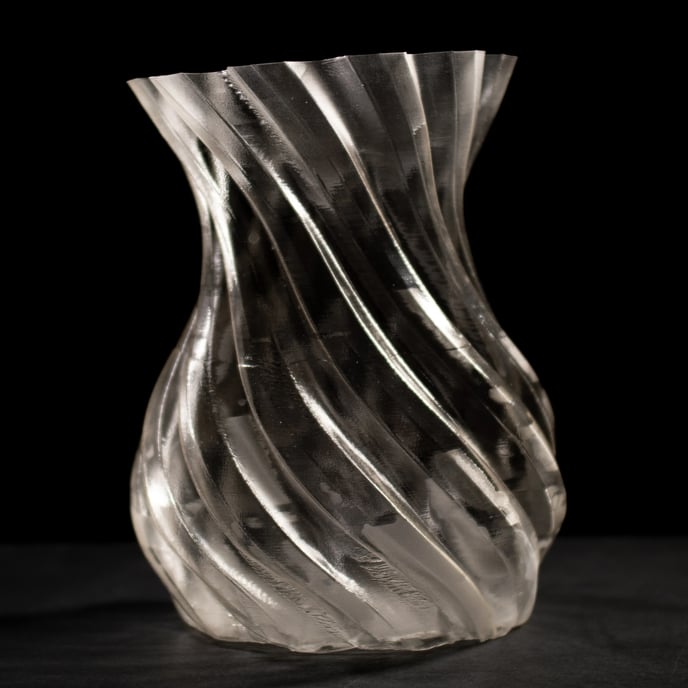 |
Surely you have seen that many of the 3D printing filaments on the market have a translucent variant, which can be used for aesthetic purposes for the creation of screens, lamps, vases In this article you will find various tips and tricks to increase the degree of transparency of your pieces. In this article you will find various 3D printing tips and tricks to increase the degree of transparency of your pieces. |
Before we start with the printing tips, let´s explain the concepts of transparency and translucency:
- "Transparency is the property a material has allowing light to pass through thus letting you to see through it clearly."
- "On the other hand, a translucent material allows light to pass through but does not offer a clear view through it"
Translucent and non-transparent prints are regularly created, however, it is also possible to create transparent prints if some post-processing is carried out as will be seen later.
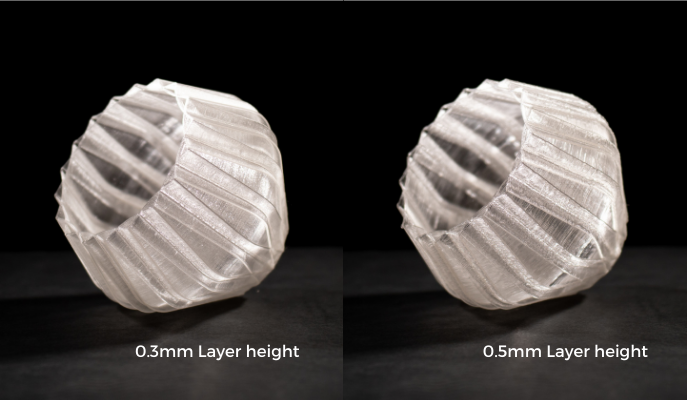
Tip 1: Print very thick layers
To make the piece more translucent, the layers need to be as thick as possible. This is because light scatters through the layers, meaning that the more layers a piece has, the greater the light scattering, making the object less translucent.
- Recommendation: Use 0.8mm or 1mm hotends and layer heights of 0.4mm or more.
Making thicker layers will also help to make post-processing easier if more transparency is desired.
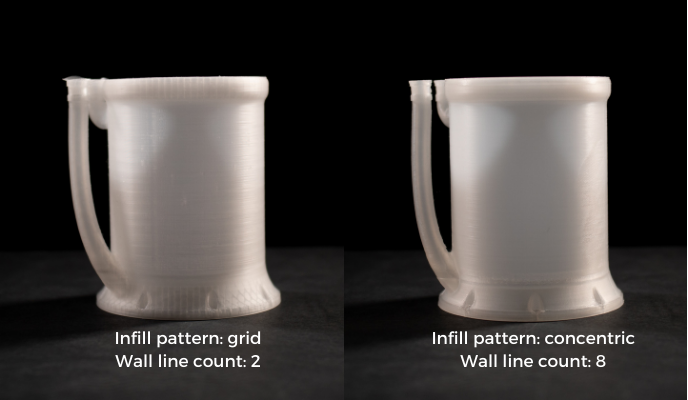
Tip 2: Avoid Visible Infill
In 3D printing, pieces are generally not completely solid, consisting of a perimeter and an infill. Such structures are visible when printing with translucent material, which scatters light and reduces transparency.
In case your piece must not be hollow, the goal would be to remove or reduce the visibility of the infill, this doesn't greatly increase transparency but improves the aesthetic finish.
- To do this you can make use of the concentric fill pattern and reduce the fill density.
- To reduce fill marks in narrow areas of the part, it is recommended to increase the number of perimeters.
Tip 3: Improve layer bonding and glossiness
Improving the union between layers and increasing their glossiness can help to create a higher level of transparency, for this it is necessary to print more slowly and at a higher temperature.
By doing this, the layers melt better, reducing the visibility of the bond between layers and forcing the light to not scatter. Also, printing at a higher temperature (within the recommended values) gives the material a glossy finish.
Generally speaking, print at the maximum temperature recommended by the manufacturer and at a printing speed below 20mm/s. You can also reduce the layer fan speed to improve interlayer adhesion.
Tip 4: Post Processing: Solvent Application
In order to increase the transparency of your printed model, it is necessary to do post-processing. The best process is to administer a solvent bath to the model. This will smooth out the layers, giving the piece a glassy appearance and making it transparent.
To perform an acetone bath you can use a 3D print polisher, these devices allow you to control the amount of solvent applied to the piece and the duration of the process.
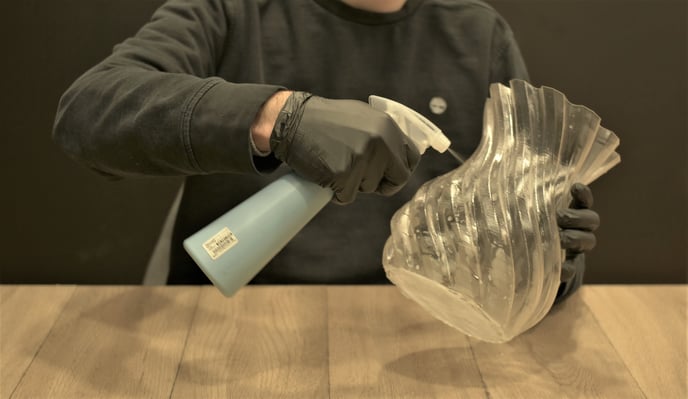
If you do not have this type of device, you can use a spray bottle to apply the solvent directly onto the piece and then remove it with water. Below you will find tips on how to apply the solvent:
- Apply a thin layer of solvent onto the print, avoid dripping or accumulation on the crests of the piece.
- If the piece is hollow, use a spray bottle with water to remove the solvent. If the piece is solid, you can submerge it directly into the water.
- Wait at least 30 minutes before applying a new layer of solvent.
Warning!
- During these processes, it is possible for toxic gas to be released, therefore we recommend doing them in a properly ventilated and open environment.
- Do not leave any piece in contact with the solvent continuously for more than 10 minutes, doing so ran irreparably damage the piece
Conclusions
- Use larger diameter hotends (0.8mm or 1mm) and increase layer height
- Print at the maximum print temperature recommended by the material manufacturer and at a print speed of 20mm/s
- Avoid having infill structures or, if you must, use the concentric pattern of the infill
- Increase wall line count above 5
- Use the recommended solvent for your type of material to make a solvent vapor bath and improve the overall finish of the piece
Send us your comments about this article
|
You can help improve the BCN3D Knowledge Base. If you feel there are guides that we are missing or you found any error, please use this form to report it. Report form :) |